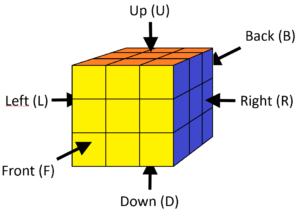
 To solve the final layer of the cube, first orient it so that the unsolved final layer is facing up. With the final layer facing up, begin by solving the edge blocks.
Step 1 – Flipping the edge blocks
The edge blocks in the final layer may be oriented correctly (upward-facing color matching the upward-facing middle tier), or flipped. If any edge blocks in the final layer are flipped, they will be flipped in pairs: two or four. The sequence to get them all oriented correctly is the same in all cases, just needs to be repeated as often as required.
 If all four edge blocks are flipped, twist this sequence:
R+ U+ B+ U- B- R-
This will flip two opposite edges, bringing you to step 2.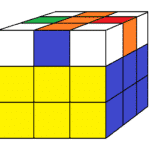 If two opposite edge blocks are flipped, twist the same sequence as 1:
R+ U+ B+ U- B- R-
This will ensure that two adjacent flipped edges are left, bringing you to 3.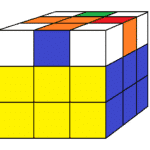 With two adjacent edges flipped, turn the top layer to orient those two blocks up-right and up-back. Then twist the same sequence once more:
R+ U+ B+ U- B- R-
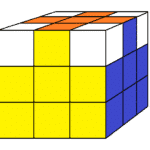
After this, all edge blocks in the final later should be oriented correctly. Next step is putting them in their correct positions.
Step 2 – Positioning the edge blocks
All edge blocks in the final layer are now oriented correctly, with their up-facing colors matching the color of the middle tile. They may not be in the correct positions yet though: side-facing colors may not all match the side-facing middle tiles. The sequence to position them correctly rotates three edge blocks simultaneously.
- Twist the top layer so that only one edge block is in its correct position.
 Orient the cube so that the correct edge block is facing you (up-front). Then twist this sequence:
R+ U+ R- U+ R+ U2 R-
If necessary, repeat this sequence once more.
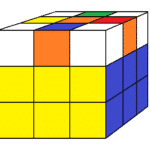
![]() This should leave you with all the edge blocks in the final layer oriented and positioned correctly. Now only the vertices of the final layer need to be solved.
This should leave you with all the edge blocks in the final layer oriented and positioned correctly. Now only the vertices of the final layer need to be solved.